
Years behind the desk taught me this: real mixing rarely means raw loudness, it means negotiating the distance between a quietest whisper and the loudest peak until that gap finally closes, session after session, quietly.
Long before mastering enters the picture, most tracks already reveal their character through repeated listening, not measurement — you learn to hear where the average level sits and where the dynamic range genuinely breathes or suffocates.
The single most misunderstood idea in this field is that reducing loud moments somehow flattens a track; done well, it does the opposite, sharpening clarity until the entire sound feels closer, more intimate, more alive.
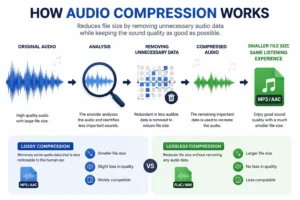
People often confuse this with data compression, the kind an MP3 file uses to shrink storage; this process is closer to an automatic volume control, quietly holding consistency across an entire performance without anyone noticing.
Watching meters dance taught me far less than trusting my own ears, though every polished record still shows it: peak levels tamed just enough that the whole mix feels genuinely polished, never squashed, never lifeless.
The Core Parameters Every Compressor Shares
Every compressor — hardware or plugin — is built around the same handful of controls. Understanding what each one actually does is the difference between shaping a mix on purpose and guessing until something sounds “less bad.”
Threshold
Every session has a starting point: lowering the threshold in dB until peaks cross -10dB lets compression engage, and gain reduction of 4dB to 6dB still becomes the decibel example worth watching at any level.
Ratio
Above the threshold, ratio settings shift attenuation from a moderate 2:1 through medium 3:1 and 4:1, into strong 5:1 and 8:1 bands, until 20:1 approaches limiting, and ∞:1 truly mirrors infinity itself — a clear example.
Attack
Once threshold is crossed, attack time decides everything: microseconds engage instantly, carrying real risk of distortion on low frequencies, while milliseconds preserve transient character on vocals, though fast attack settings can still cause consonant loss.
Release
Release timing matters as much as tempo itself: a short release lets the signal return to its uncompressed state almost instantly, but rushed release time always invites pumping and breathing that naturally fight the groove.
Knee
A soft knee eases compression in gradually, giving a smooth transition, while a hard knee snaps on abruptly — that single knee curve always decides whether the abrupt onset feels natural or obvious across the mix.
Output/Makeup Gain
Makeup gain compensates for level lost to attenuation; the GR meter, or gain reduction meter, always shows exact output gain restored — through tube warmth or solid-state circuits — for a fair comparison, a true A/B comparison.
Compressor Types and Their Character
Not all compressors sound the same, even at identical settings. The circuit design behind the compressor shapes its sonic signature just as much as the numbers you dial in.
Tube/Variable-Mu
A vintage variable-mu tube compressor like the Fairchild reacts slowly, but that colored, characterful warmth and rich coloration are exactly why engineers still reach for that tube character today, decade after decade, without any apology.
Optical
The Teletronix LA-2A built its early reputation on a light element paired with an optical cell, producing a slower, smoother response than most gentle optical designs that quietly followed it across decades later still today.
FET
The UREI 1176 uses FET transistor circuitry to emulate real tube sound, delivering a fast, clean punch that still emulates warmth without ever needing an actual tube stage at all in modern digital plugin recreations today.
VCA
A VCA compressor built around control voltage circuitry — think SSL G-Bus or dbx — reacts with precise, fast timing that stays remarkably transparent and clean, delivering surgical accuracy even at ratios pushing 160:1.
Why Compress?
Every engineer eventually confronts the same risk: chasing natural sound too aggressively invites over-compression, where subtle shifts in tone turn into obvious coloration, then audible artifacts — an added, excessive grab for control that quietly strips away the very character that made the take special.
Compression Tips and Techniques
- Start conservative: a 2:1 ratio is a safe starting point for most sources, moving toward 5:1 only once you trust what you’re hearing.
- Use staged compression — several gentle passes rather than one heavy squeeze — to protect timbre across a full mix.
- Treat compression as a creative effect, not just a corrective one, but apply that approach with caution.
- Multiband compression demands real subtlety; every small change is audible immediately across the frequency spectrum.
Compression for Enhancement
Reach for a LA-2A or MLA-2 when you want colorful, tone shaping warmth instead of pure control; a GML or Maselec stays transparent, while the 1176 and other hardware compressors — even the 8900 — each print their own character onto a signal, for better or worse.
Preferred Compressors for Professional Use
Walk into any professional room and the same hardware keeps reappearing: Neve and Manley Core units, the Tube-Tech CM 1A, Empirical Labs Distressor, the Neve 33609 JD, Thermionic Culture Phoenix, and SSL G-Series all remain favorites for good reason.
How Audio Compression Works in Practice
Watch any real-world demonstration video and the same application repeats itself: a simple example of parallel compression blended under a dry signal, proven in practice long before any manual explains why it works.
What Is Audio Compression Doing to Your Sound?
The key distinction worth understanding: this isn’t data compression like an MP3 shrinking file size, it’s an automatic adjustment of dynamic range, visible on any gain reduction meter, controlling volume and shaping sound — a simple explanation that clears up most confusion.
When Does Compression Become Limiting?
Push an extreme ratio far enough and ordinary compression becomes a limiter, catching peaks at a brickwall ceiling — essential at the mastering stage, though a common mistake is reaching for fast attack limiting to start fixing mix problems that a threshold-based compressor should have solved first.
Advanced Techniques: Parallel, Sidechain, and Multiband Compression
Once the basics are second nature, three advanced techniques open up real creative control:
- Parallel compression (sometimes called New York compression) blends a heavily squashed copy of a signal under the dry original, adding punch and density without sacrificing the natural life of the performance.
- Sidechain compression lets one source duck another automatically — the classic example is a kick drum carving out space from a bass line on every hit, a technique borrowed from dance music production and now used everywhere.
- Multiband compression splits a signal by frequency — low, mid, and high — and compresses each band independently, solving problems that a single broadband compressor can’t reach without affecting the whole mix.
Where Do You Go From Here?
Real development past this point comes down to ear training, not more plugins; trust your listening skills over any meter, treat every session as practice, and the only honest guidance I can offer as a closing thought is that the next steps are always repetition, not theory.
Frequently Asked Questions
Does every track need compression?
Not necessarily. Some mixes call for restraint, while others genuinely need intervention. Weighing that need honestly — rather than compressing out of habit — is often what separates an experienced ear from a guessing one.
What’s a good starting point for vocal compressor settings?
A moderate ratio (around 3:1 to 4:1), a threshold that only catches the loudest phrases, a medium attack time to preserve consonants, and a release timed to breathe naturally with the phrasing is a reliable starting template.
How do I know if I’m over-compressing?
Audible pumping, harsh distortion, and unnatural artifacts are the clearest warning signs. Once you notice them, dial the settings back before the track loses its natural dynamics entirely.
Compression vs. saturation — which one for warmth?
Saturation adds harmonic warmth and tonal color through subtle distortion. Compression controls dynamic range without necessarily changing tone at all. They’re complementary tools, not substitutes for each other.
Should I compress before or after EQ?
Both orders are used in professional mixing, and the “right” answer depends on the source. Compressing before EQ tames dynamics first, so the EQ reacts to a more controlled signal. Compressing after EQ means the compressor responds to the already-shaped tone, which can change how it reacts to specific frequencies. Try both on a given track and trust whichever sounds better in context.


